
 August 17, 2010
2014-06-16 Update: After spending a fair bit of time on getting this technique to work, I have come to the conclusion that it is too slow to use on a network and can’t recommend it to others. If you plan to use this on stand alone or runtime solutions, it could still be an interesting approach. I ended up going with a set of Move Up/Move Down buttons and it seems to fit the bill better.
Last year at the FileMaker Developer’s Conference, this technique for doing drag and drop within FileMaker, was demonstrated.
At the time it seemed like it might be a dubious hack, as no one was sure whether FileMaker would continue to work this way. From what I have read FileMaker has approved the technique and it should continue to work, as new versions come out.
The good folks at Excelisys made this demo file available. I include some of the text from their help file. It didn’t make total sense until I dissembled the file and attached some images to what they were talking about. Here are my notes and screenshots blended into their documentation.
Drag and Drop Sorting
A popular request from users is the ability to change the order of items in a portal via drag-and-drop.
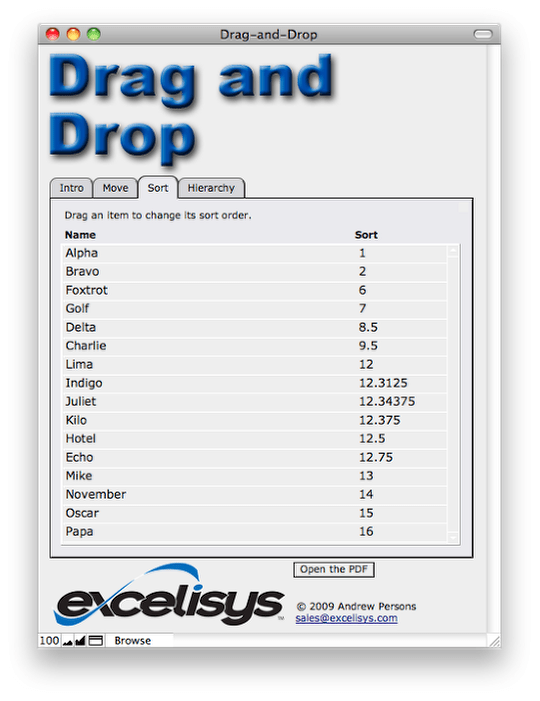
Standard Portal Setup

The Sort tab in the demo file contains a portal with a straightforward relationship. It’s sorted by the sort field, which we’ll manipulate to allow the user to customize the sort. The sort field is serialized, incremented by 1 to provide the default sort.
Field Definitions in Portal to Sort
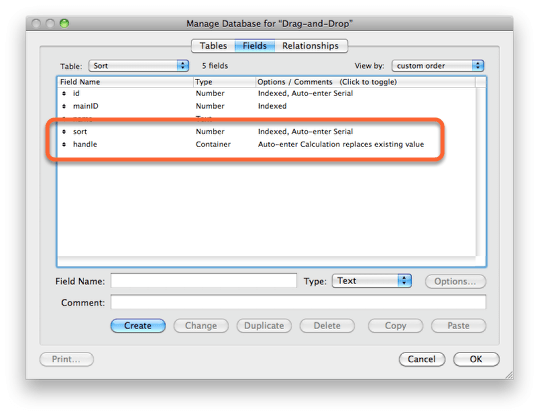
It needs a Sort Field and a Handle field.
Note that the Sort field has an Auto Enter Serial Number. This creates an initial sort order for the items in the portal. This field gets modified by the handler script when it gets invoked.
Handler field with Auto Enter Calc applied
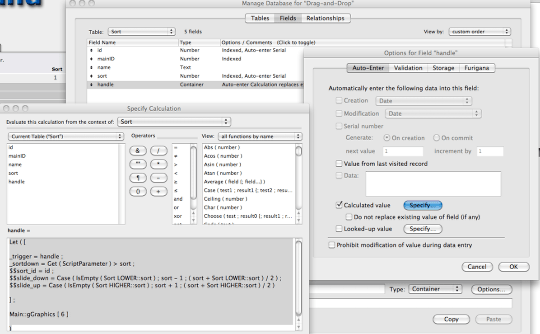
It also contains a container field named ‘handle’, with an auto-enter calculation:
Let ( [
_trigger = handle ;
_sortdown = Get ( ScriptParameter ) > sort ;
$$sort_id = id ;
$$slide_down = ase ( IsEmpty ( Sort LOWER::sort ) ; sort – 1 ; ( sort + Sort LOWER::sort ) / 2 ) ;
$$slide_up = Case ( IsEmpty ( Sort HIGHER::sort ) ; sort + 1 ; ( sort + Sort HIGHER::sort ) / 2 )
]; Main::gGraphics [ 6 ]
See the last step for a detailed description of how this all works.
Sort Item Script
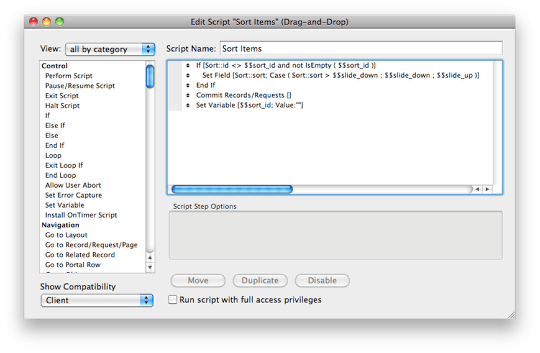
Now that we have the higher and lower values in global fields, let’s look at the triggered script.
If [ Sort::id <> $$sort_id and not IsEmpty ( $$sort_id ) ]
Set Field [ Sort::sort; Case ( Sort::sort > $$slide_down ; $$slide_down ; $$slide_up ) ]
End If Commit Records/Requests Set Variable [ $$sort_id; Value:”” ]
Setup of Layout
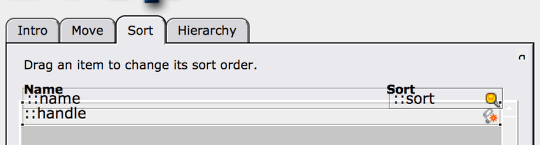
Hide the handle field at the bottom of any data fields, within the portal. Attach a Script Trigger to the handle field.
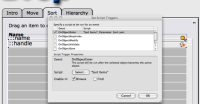
Attach Script Trigger to Handle field
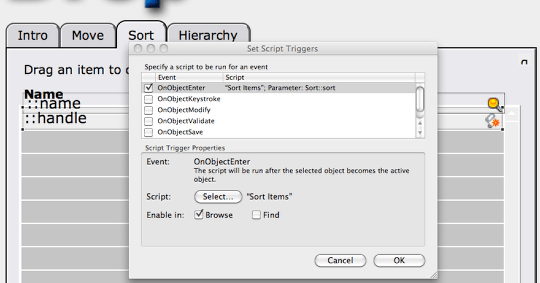
The Handle field has a script trigger that causes the items to resort.
Script Parameter for Handle field
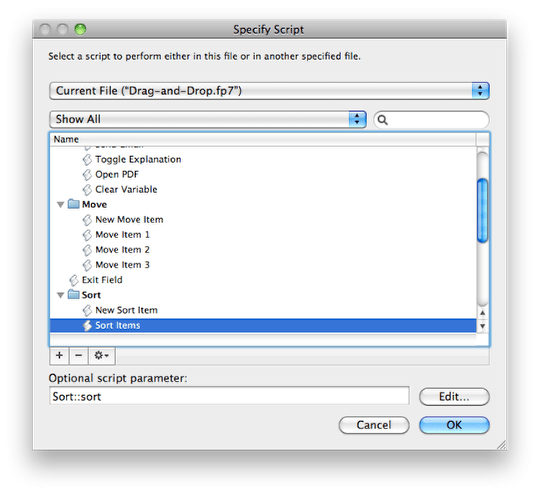
Give it the the sort order field as a parameter.
This is very similar to the Move script, except that we have to determine which of the two values to use. We can determine this simply by comparing it to either of the values. If we’re dragging the record up, both values are going to be smaller; if we’re dragging it down, both values will be lower. Therefore we know that if the current sort value is greater than either variable (we arbitrarily choose $$slide_down), we want to use $ $slide_down; otherwise, we use $$slide_up.
There we have it. The user is now able to drag items in the portal to whatever position they desire
The Guts of What is Going On…
IMPORTANT NOTE: You don’t need to read this to get things working, it is just here to explain what is going on….
As you can see, it is a bit more complicated than the last example. Let’s deconstruct it.
_trigger = handle ;
As before, the calculation needs to be triggered any time the field is modified.
_sortdown = Get ( ScriptParameter ) > sort ;
The script attached to the handle field in the portal passes the id of the original record via the script parameter. By comparing it to the sort field of the target record, we can determine whether the user is moving the record higher or lower in the list, so we can provide the expected behavior. If the user is moving the record higher, it needs to be sorted above the target record; if he is moving it lower, it should sort below. This ensures that the original record will “replace” the target record in the order, while the others slide up or down as needed.
$$sort_id = id ;
We need to record the id of the target record so that we know if the user releases it within the same record or outside the portal.
$$slide_down = ase ( IsEmpty ( Sort LOWER::sort ) ; sort – 1 ; ( sort + Sort LOWER::sort ) / 2 ) ;
This sets $$slide_down to the value that the original record would need if we were dragging it “up” the list. That is, it would sort above the target record, and the records between them would “slide down”. It uses a self relationship created to facilitate this: Sort LOWER. It has two predicates.
mainID = mainID
sort > sort
It is also sorted by the sort field, descending. Using this relationship, we can find the record immediately above the current record in the portal. A similar relationship, Sort HIGHER gives us the opposite ability.
This line in the calculation sets $$slide_down to the value halfway between the sort value of the current record and the previous one in the portal. We don’t necessarily have to worry if it’s the first one in the portal because it will return a value that’s half of the current one in such a case, which will work. However, we check anyway, since we can provide a number one smaller, rather than halving it. This provides a greater “lifespan” of valid numbers before the maximum of 400 significant digits is reached.
$$slide_up = Case ( IsEmpty ( Sort HIGHER::sort ) ; sort + 1 ; ( sort + Sort HIGHER::sort ) / 2 )
This is similar to the preceding line, except here we have to worry if it’s the last one in the portal. We check if the next highest sort value is empty; if it is, we simply add one step to the sort value. Otherwise, we halve the difference.
2014-06-16 Update: I went back and tried to implement this technique and found that there was still some information missing. Here are all the steps to add Portal Row Drag and Drop sorting to your solution:
Temporarily Rename your Databases
For the purposes of simplicity, it is easiest if you change the name of your two relationships to ‘Main’ and ‘Sort’. When you are done adding the functionality below, go back and rename these two Data Tables/Table Occurrences.
Create Data Table (or rename an existing table occurrence) ‘Main’
- MainID – serial number
- One_Pixel – Global Container field to store 1×1 pixel graphic
- Whatever other text fields required for your solution.
Create Data Table (or rename an existing linked table occurrence) ‘Sort’
- ID – serial number
- MainID – number field
- Sort – serial number
- Handle – container field
- Name – text field
- Whatever other text/number fields required
Add Two Self-Relation Table Occurrences to the ‘Sort’ Table Occurrence
- – ‘Sort HIGHER’ Table Occurrence
- Main::MainID = Sort::MainID
- Sort::Sort > Sort::Sort
- Sort by Sort Ascending
- – ‘Sort LOWER’ Table Occurrence
- Main::MainID = Sort::MainID
- Sort::Sort<Sort::Sort
- Sort by Sort Descending
Go back to the field definition of the field ‘Handle’
- With these two Self Relations in place, go back to the field definition of Handle and add this Auto Enter Calculation:
- Let ( [ _trigger = Handle ; _sortdown = Get ( ScriptParameter ) > Sort ; $$sort_id = ID ; $$slide_down = Case ( IsEmpty ( Sort LOWER::Sort ) ; Sort – 1 ; ( Sort + Sort LOWER::Sort ) / 2 ) ; $$slide_up = Case ( IsEmpty ( Sort HIGHER::Sort ) ; Sort + 1 ; ( Sort + Sort HIGHER::Sort ) / 2 ) ] ; Main::One_Pixel )
- Toggle off the ‘Do Not Replace’ option – you want this calculation to happen each time the field is entered. The Let Function conditionally sets the three Global Variables ($$sort_id, $$slide_down and $$slide_up) and the end result is always to set the Container field back to the One_Pixel graphic.
Import Graphic
- In Browse mode, import a one pixel by one pixel white square into the One_Pixel global field in the database Main.
Layout Mode – creating the portal – ‘Main’ Data Table to ‘Sort’ Portal
- Draw out the Portal shape – set the repetitions to the number of rows required.
- Set the Sort order to the Sort field.
- Place the field ‘Handle’ on the bottom of the first Portal Row (using ‘Send to Back’)
- Attach an OnObject Enter script trigger to the ‘Handle’ field. Set it to ‘Sort Items’ script
- Add a Script Parameter to the field. Set it to: ‘Sort::Sort’
- Allow entry into the ‘Handle’ field
- Use ‘In Focus’ Formatting to highlight the ‘Handle’ field when active
- Add other fields (Name and Sort minimally) to the first row of the portal on top of the ‘Handle’ field.
- Turn off Data Entry into any other fields in the portal except ‘Handle’
Test solution
- You should now be able to drag and drop and have the sort order update dynamically after you let go of the field in a new position
- Check that the Sort number is changing you should start to see fractions in the sort order. It starts out as ‘1,2,3,4,5,6 etc’ but soon should look like this ‘1, 2,3,4.5,5, 5.25…’
- If everything is working as advertised, rename your table occurrences to something more meaningful to you and your solution.


There’s a basic characteristic of the interface that I’m not comfortable with. Ideally the drag interface should allow you to drag an entry to a gap between two entries. Picasa web albums does this nicely by nudging apart the images to the left and right of the gap you’re hovering over – see the “organise and reorder” option. If you let go, the image you’re dragging, will fall in the gap.
With this technique, FileMaker is only aware of which entry you’re dragging onto. The interface works differently if you’re dragging something up or down in the list. If you drag something up, the dragged item will be placed ABOVE the item you drop it onto. If you drag something DOWN the item you drag will be placed BELOW the item you place it onto. I think my users will find this confusing.
I want to implement this function because it’s really cool. I fear thought that I’m losing sight of the overall objective of making a predictable and useful interface.
Do you think that the function will be improved by having it work consistently: a dragged item always falls below the entry it is dragged onto?
Kevin
You can always add another field in the gap underneath the field and use this to trigger a drag-below script. Each record in my database has 2 fields – one above the other – one for drag-into, one for drag-below. Not quite as sexy as the animated versions in dedicated apps but at least it works.
Jim
the technique does not work when using two BD (Code / Data), any suggestions.
😦
saludos
Rod