

 March 27, 2023
This could be useful for designing a custom set of text boilerplates to quickly add to an email or in a data entry situation. These panels allow you to create a set of custom buttons that can perform a variety of tasks, from typing pre-defined text to executing scripts or even launching applications. I realize you can already do this with Text Replacements, but having a floating panel of well labelled buttons is a more visual approach. It seems you can make the panel as large and complicated as you like and have multiple panels for different uses.
Here are the steps:
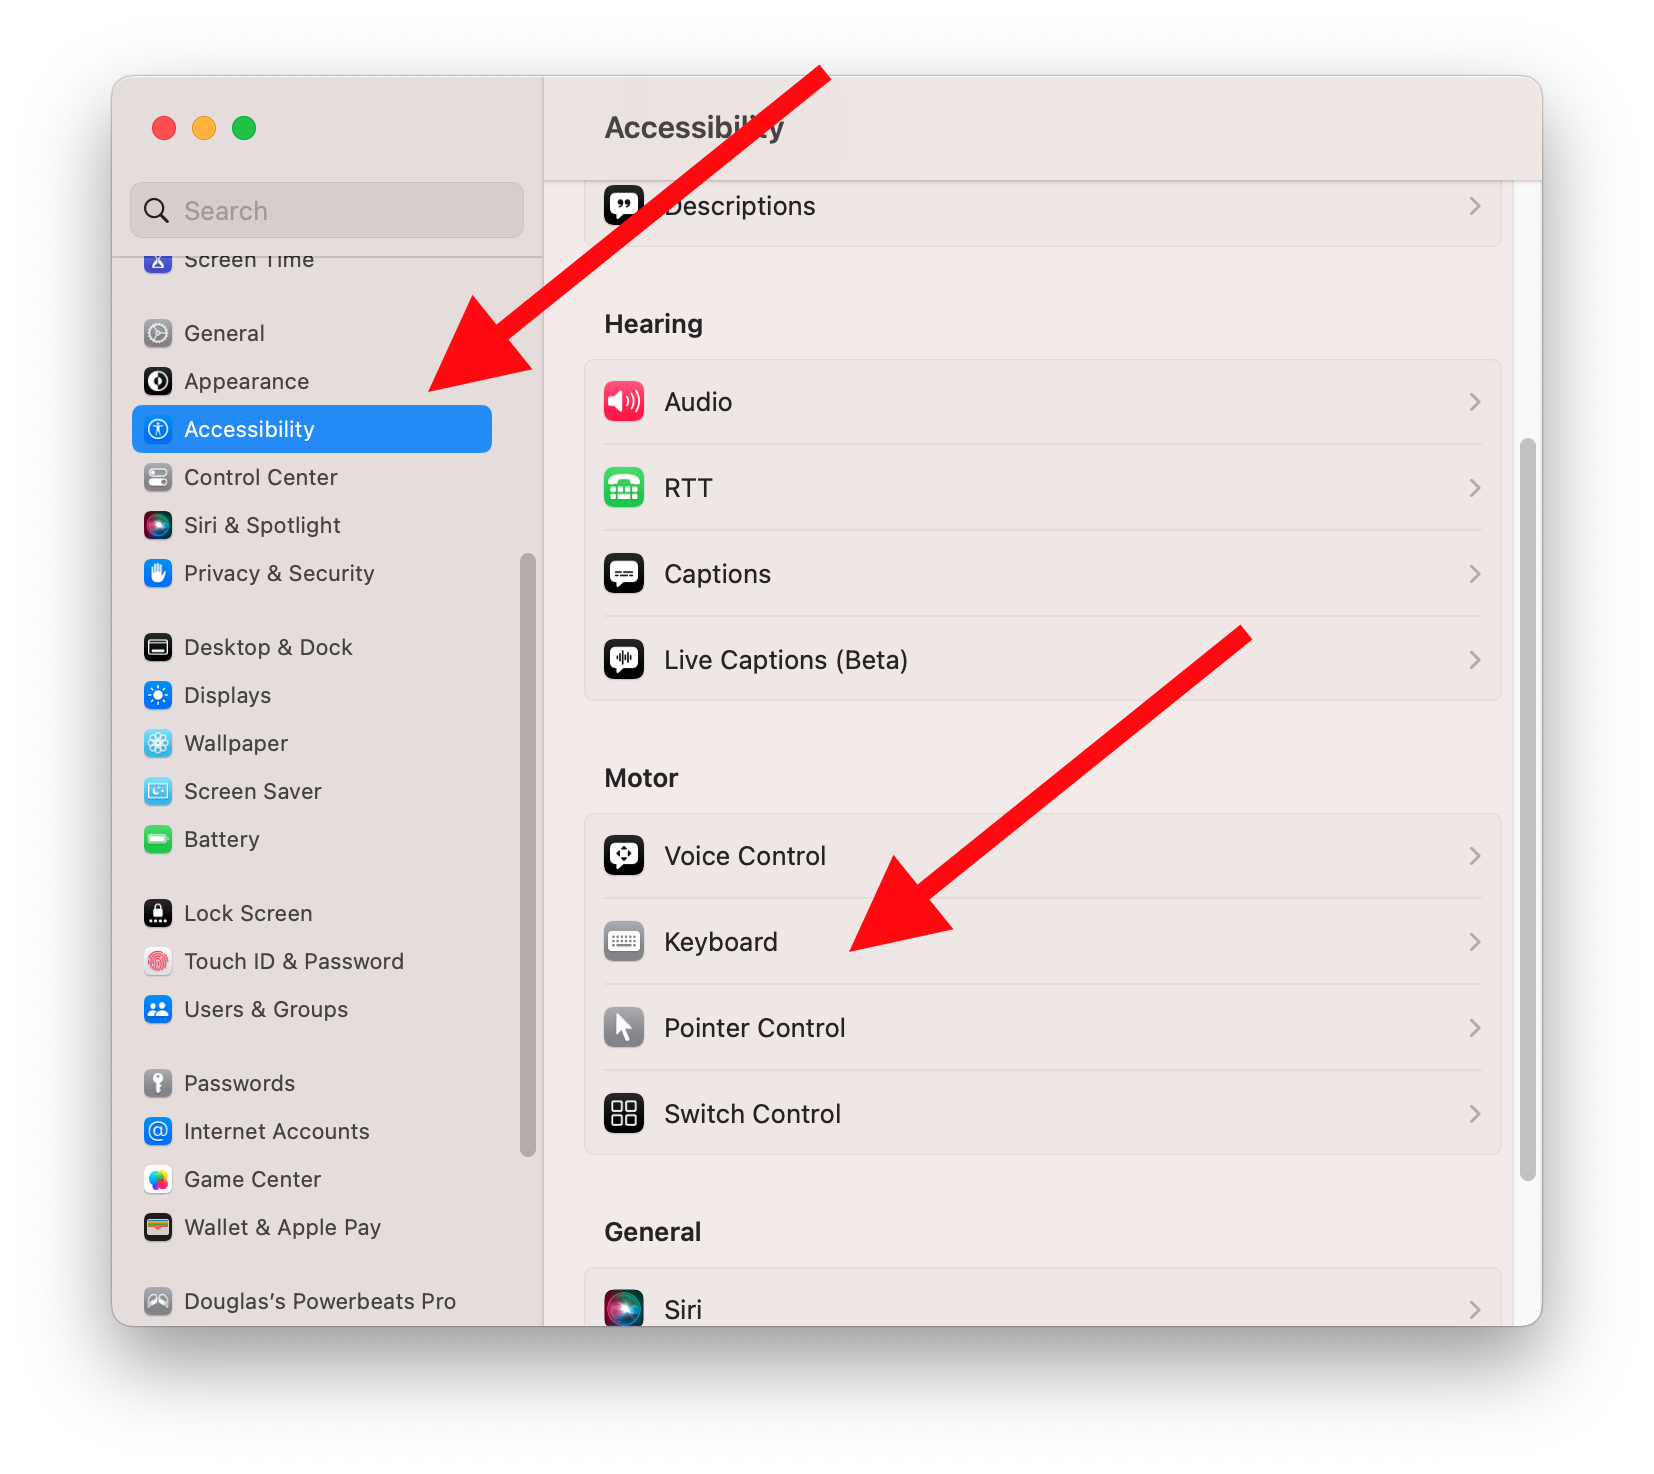
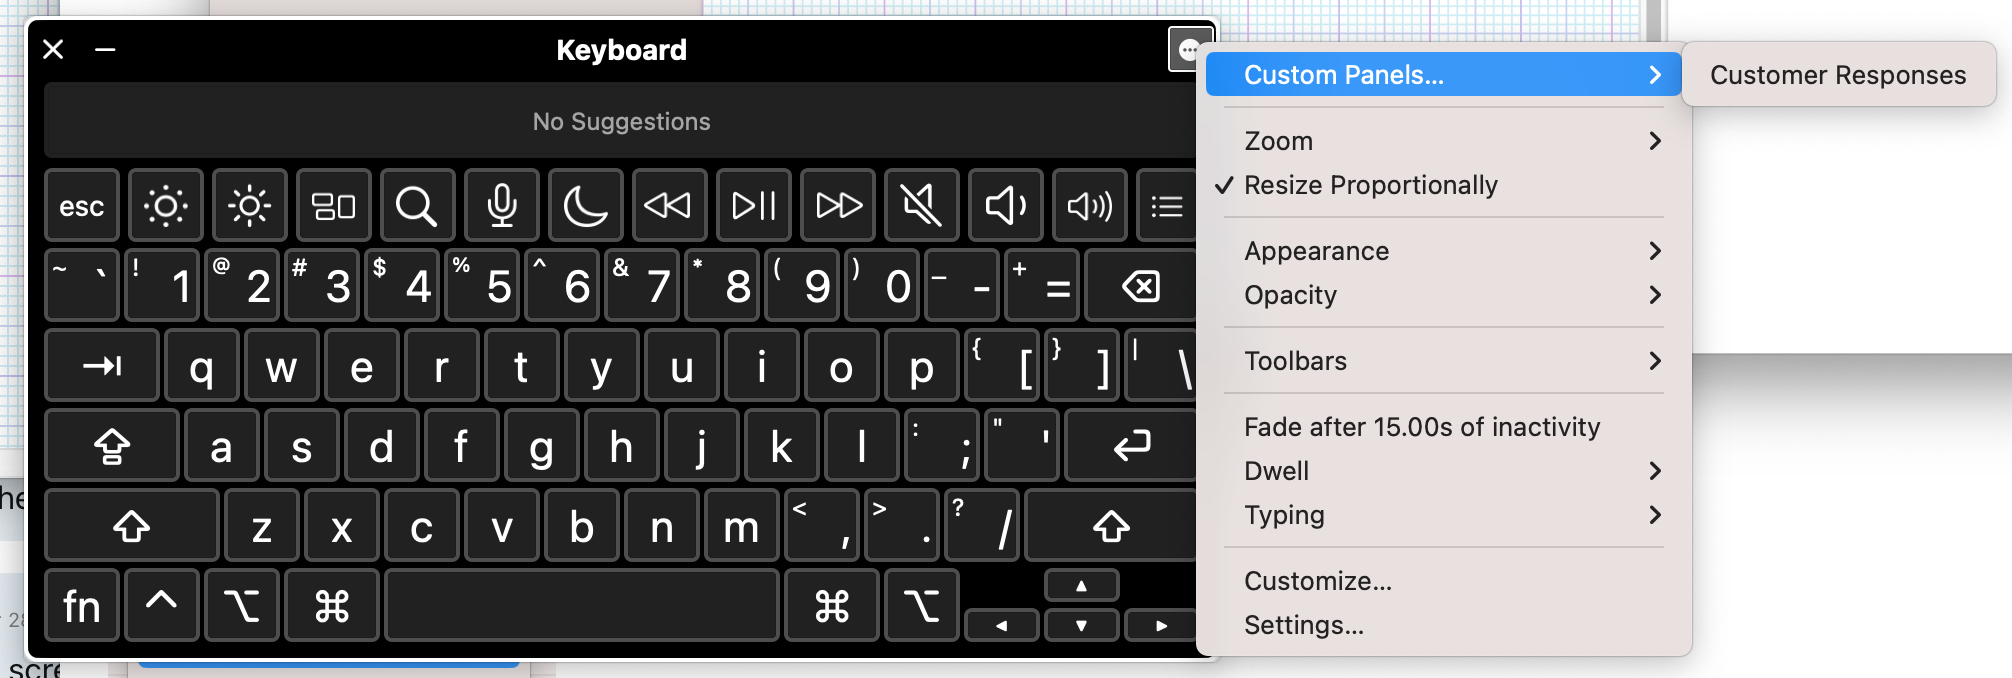
To get started, you’ll need to enable the Accessibility Keyboard on your Mac. This can be done by going to System Preferences > Accessibility > Keyboard and checking the box next to “Accessibility Keyboard.” Once you’ve done this, you can access the Accessibility Keyboard by clicking on the keyboard icon in your menu bar.
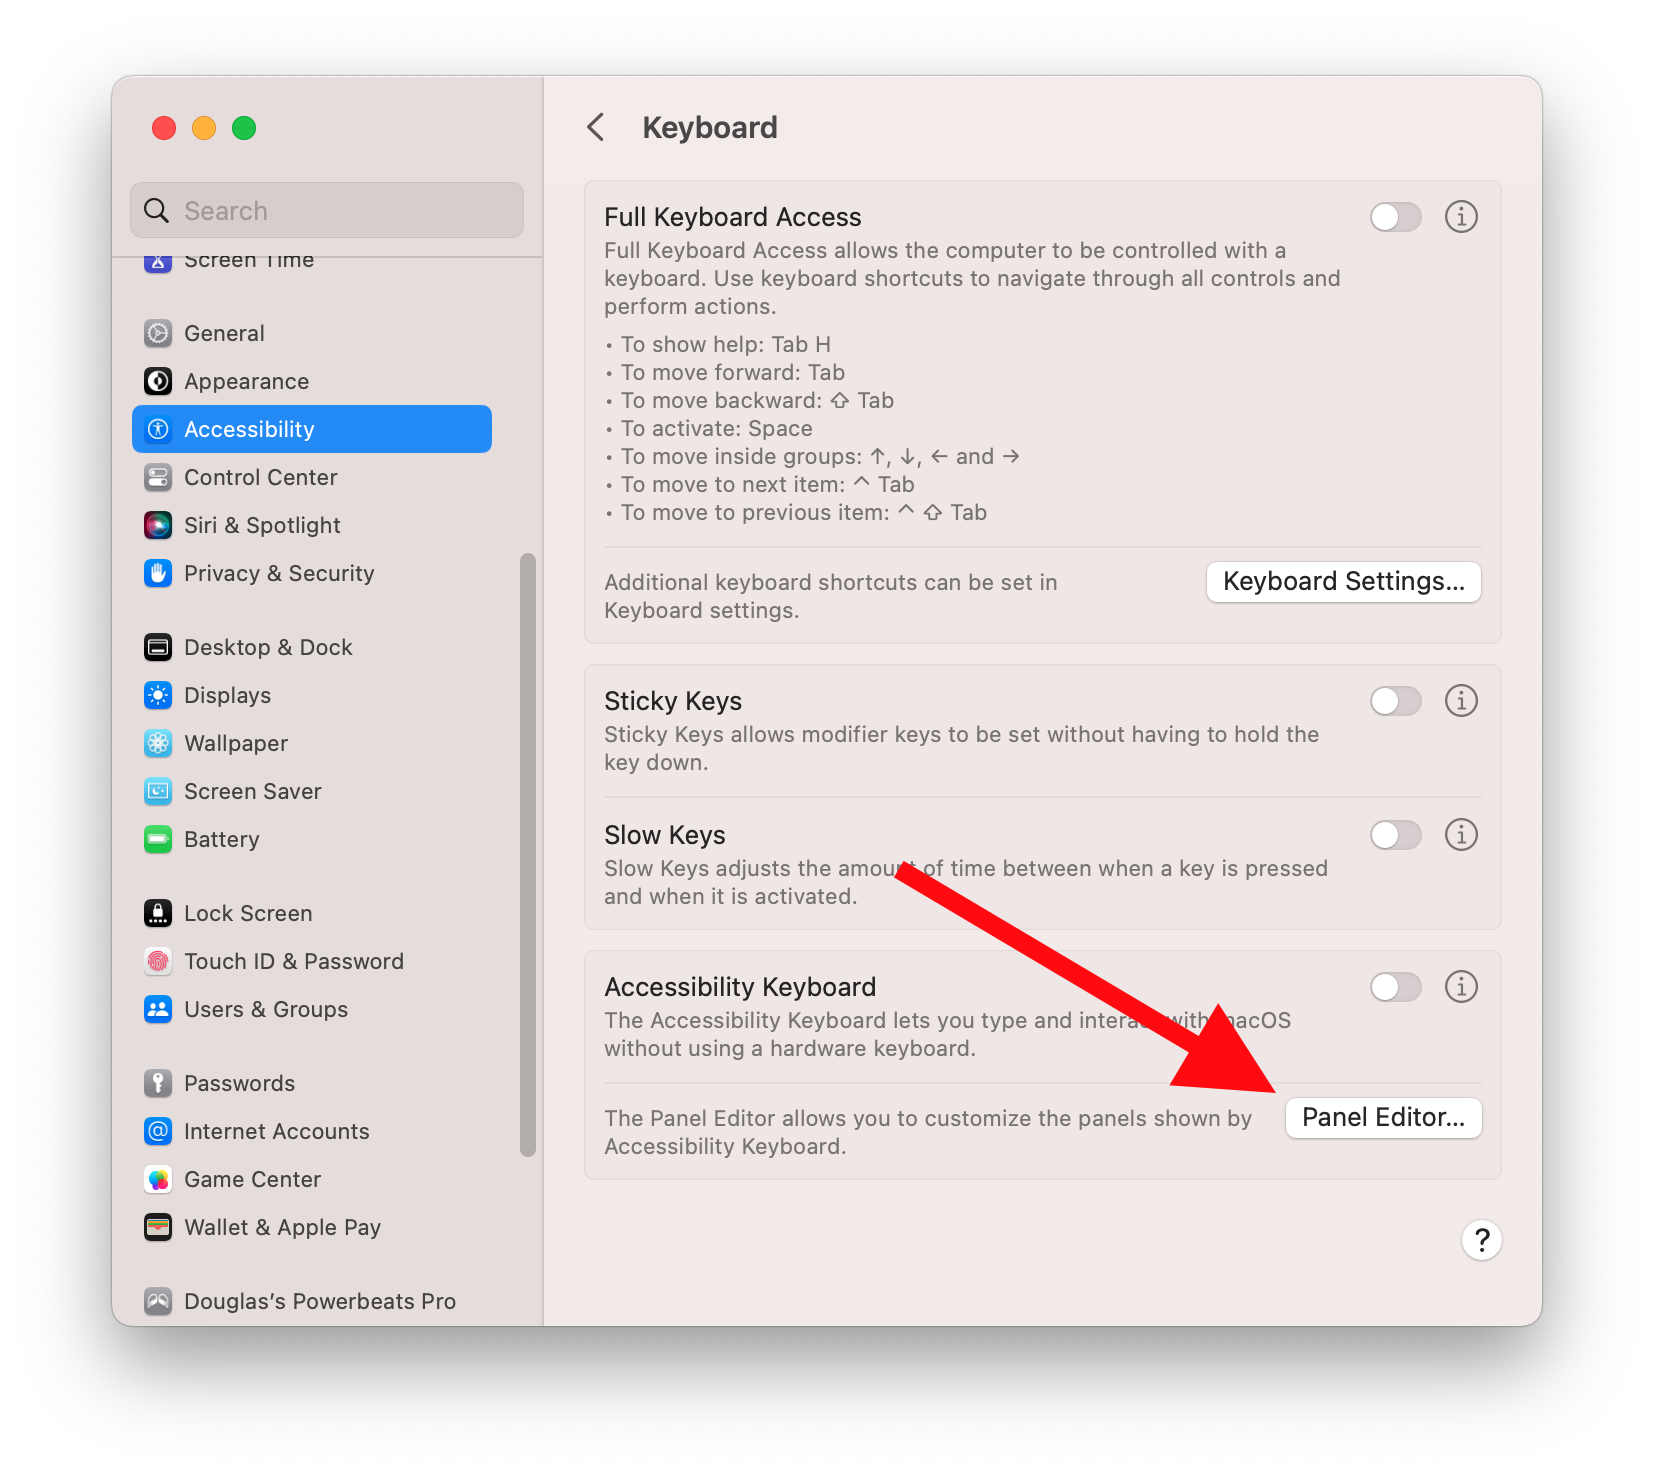
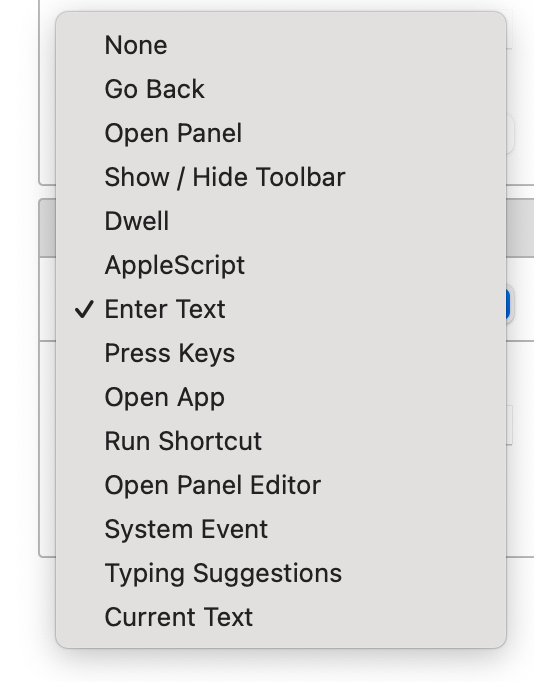
To create a custom panel, click on the “Panel Editor…” button at the bottom of the Accessibility Keyboard window. This will open a new window where you can drag and drop buttons to create your custom panel. To add a new button, click on the “+” button and choose the type of action you want the button to perform. For example, you could choose “Type Key” to have the button type a specific key on the keyboard, or “Run Script” to execute a script or command.

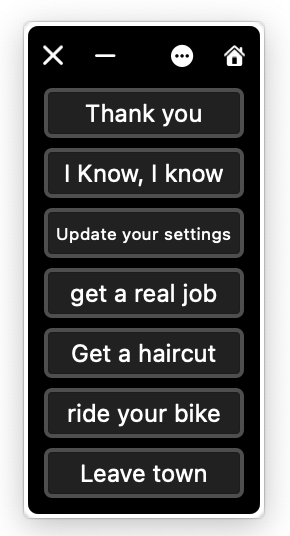
To create a button that types pre-defined text, choose “Enter Text” and enter the text you want the button to type. This is particularly useful for boilerplate text responses in emails or data entry situations in software like FileMaker Pro. For example, you could create a button that types your full name and contact information, or a button that enters a specific date or time stamp.

There is a way to share panels as well, if you create a really great one and want to circulate it within your organization. The instructions for sharing are here:
Share a panel collection
- In the Panel Editor on your Mac, choose File > Duplicate.A new window appears with a copy of the panel collection. If you don’t want to share all of the panels in the collection, delete panels from the duplicate.
- Choose File > Move To, rename the file if you want, select a target location, then click Save.
- In the Finder, select the file, click the Share button
in the Finder toolbar, then choose how to share, such as by email.
You can create a new panel collection to give to other people. Choose File > New Panel Collection, then in the new collection window, choose File > Save, or click Untitled at the top of the window to name and save the file.
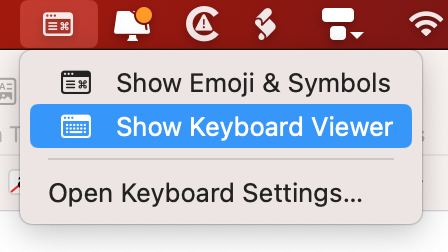
You can set your Custom Panel to be the default keyboard for specified apps, such as Mail or FileMaker Pro. This will save a step when accessing it. With the setting below, in Mail, for example, choosing Show Keyboard Viewer… will go immediately to the Custom Panel you have assigned to it.

Then set the Panel to be your Home Panel. Now, with one click, you will be able to reach your custom panel.


Accessibility for All
This is an exciting and useful technique which employs a built-in Accessibility feature that is in every Macintosh. Custom Panels in Mac OS’s Accessibility Keyboard panels can be a powerful tool for streamlining repetitive tasks. By creating a set of custom buttons, you can quickly and easily perform a variety of actions, from typing pre-defined text to executing scripts or launching applications. Whether you’re sending boilerplate text responses in an email or entering data into software like FileMaker Pro, custom panels can save you time and effort.
It’s important to note that accessibility features are not just beneficial for people with disabilities, but for all users. For example, sidewalk cuts or curb ramps were originally designed to help people who use wheelchairs or mobility aids to navigate city streets. However, they also benefit parents pushing strollers, people carrying heavy loads, cyclists, and anyone else who may have difficulty navigating a curb.
Similarly, features like closed captioning and audio descriptions were originally developed to make media accessible to people who are deaf or hard of hearing, or blind or visually impaired. However, they also benefit people who are learning a new language, watching a video in a noisy environment, or simply prefer to read or listen to content.
In this way, accessibility features not only improve access for people with disabilities, but also promote inclusivity and improve the overall user experience for everyone. By designing products and environments that are accessible and inclusive, we can create a more equitable and welcoming world for all.
This is another great example of a feature being added for accessibility and having the potential to benefit many others.
Source: Youtube video from MacMost.com


Thank you, I had no idea this exists in MacOS and it can be very useful.