
 November 21, 2018

In the past, I have tried to run an OnTimer script to keep track of time onscreen in FileMaker, updating the display text every few seconds. This is kind of a ‘busy’ approach, as OnTimer scripts are constantly taking a small amount of resources from the database. OnTimer scripts can also be annoying when you flip into Layout Mode to make changes. Finally, I found that the timing displayed would get out of whack with real time if the OnTimer script ran for a long time.
Looking for a new approach, I thought I would try using a Timer in a FileMaker Web Viewer with some Javascript. The nice thing about the Web Viewer is that the time calculation can run in its own process, so the timing seems to stay more on track. You can continue to work in FileMaker and the Timer will keep running with some caveats (see below).
Overview
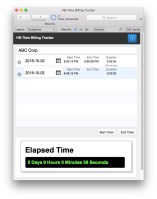
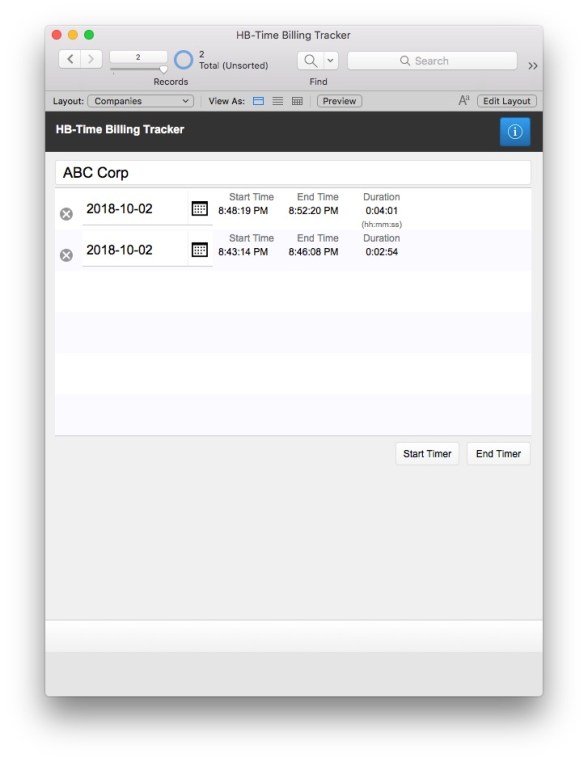
This is a simple approach and is fairly easy to integrate into other FileMaker solutions. A Web Viewer is being sent an HTML page with a Javascript timer displaying a count up. Using the same FileMaker ‘Start Timer’ script, a Start Time field is set at the same start time and then ended when clicking a FileMaker ‘End Timer’ button/script. The ‘End Timer’ script resets and hides the Web Viewer. There is no actual interplay between FileMaker and the Javascript beyond the initial page load. This leave open the potential that the two numbers might be apart by a few seconds, but it does not seem to be significant in the time horizons I have experimented with.
This demo was created by HomeBase Software using the ElapseMe Javascript library from: eCoders. It is a freebee. Use at your own risk and I encourage you to do your own testing.
Integration into your Solution
To integrate this into your solution, do the following steps:
1) Copy the folder of scripts called ‘Timer Web Viewer’
2) Copy the Named Web Viewer and the two buttons Start Timer/End Timer to your solution
3) Edit the fields Date and Start Time/End Time fields in the two scripts – ‘Start Timer’ and ‘End Timer’
4) Add the optional iOS layout if required.
5) Test
• Optional, add a Custom Function for Seconds to HH:MM:SS format.
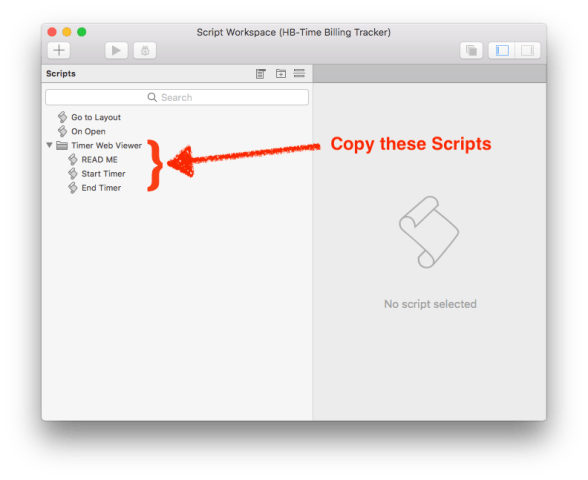
1) Copy the scripts
Copy the Folder of script and paste them into your solution database. Start Timer and End Timer scripts are the essentials, but the Read Me has useful information in it and may be useful to reference down the road.
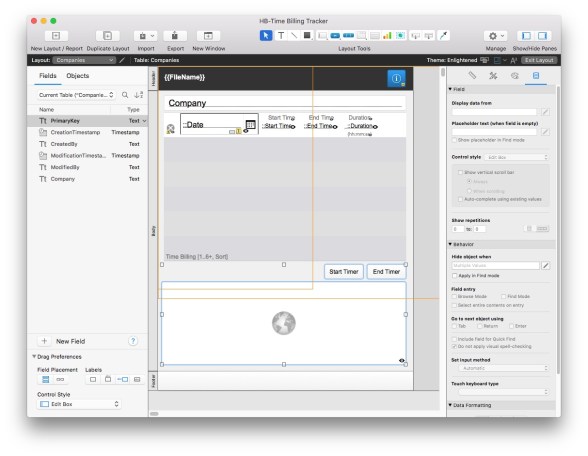
2) Copy the Web Viewer and the Buttons
The Web Viewer is named as ‘TimerWebViewer’. The two buttons correspond to the two scripts in the folder.
3a) Edit the Date and Start Time Fields
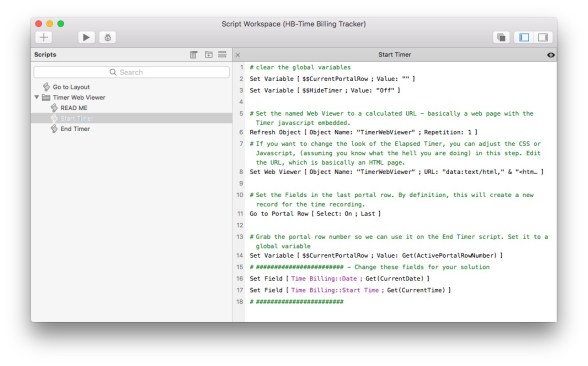
In the Start Timer script there are two fields that are set in your Time Billing table. Edit these to match your own in your system. This demo is constructed as if Time and Billing is done from the Companies layout, into a portal to the Time and Billing data table.
If your solution suits the portal row model, remember that if you have more than one portal row on the layout where you wish to display the Timer, you may need to add either Go to Object (name the portal first and then use that name in the script step) or Go to Field step, which goes to a field within the portal, before the Go to Portal Row step.
It is entirely possible to put the Web Viewer at the level of Time and Billing and have the display show up there. To do this, simply edit the Set Fields script to set a field in a local table. In that case, it would not be necessary to keep track of and go to the Portal Row. These script steps could be eliminated.
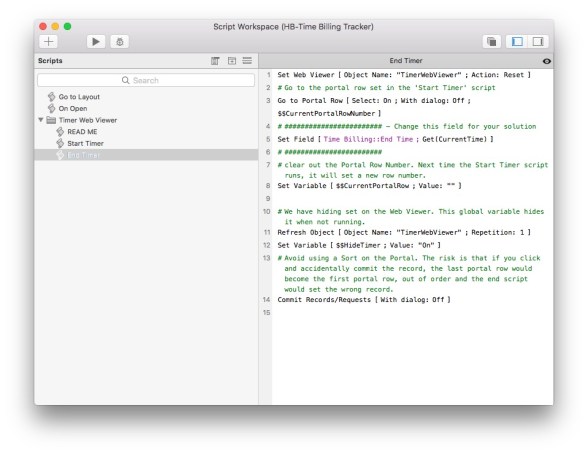
3b) Edit Fields in End Timer Script
Edit the End Time field to match the correct field in your solution.
4) Add the iPhone Layout if required
Although it doesn’t look right in FileMaker Pro on the iPhone layout, (the Timer appears to be too large) but the box and font are the right size when viewed on an iPhone or iPad.
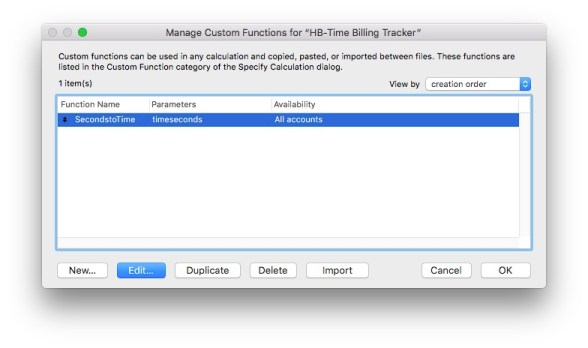
Optional – Custom Function – SecondstoTime
This custom function turns the calculation of seconds into HH:MM:SS format.
Caveats
Testing
I tested the Javascript Timer to see if it ran on iPad/iPhone. It appears that it works well, even if you leave the application, it keeps counting down. This works only on a non-hosted file. As soon as the FileMaker database file is hosted, and the user leaves the FileMaker Go app, the connection to the server gets lost and the Javascript Timer closes. Use with care on remote devices with hosted content. Switch layouts will also kill the Javascript, so if your users are likely to be moving around in the database, you may want to put the timer in a separate window and launch it off to the side of the main window.
From Brian Dunning’s newly revamped Custom Function library.
Each Web Viewer is an Independent Process
In theory, this means it is possible to run more than one Timer if you open multiple windows. Unfortunately, if you do this, the first window that you click the End Timer on will stop the second window’s End Timer from working properly. There might be a way to work around this, perhaps dynamically naming the global variables, with the Window Number added to the both the Portal Row Number variable and the Hide Timer Variable.
Changing the look of the Timer in the Web Viewer
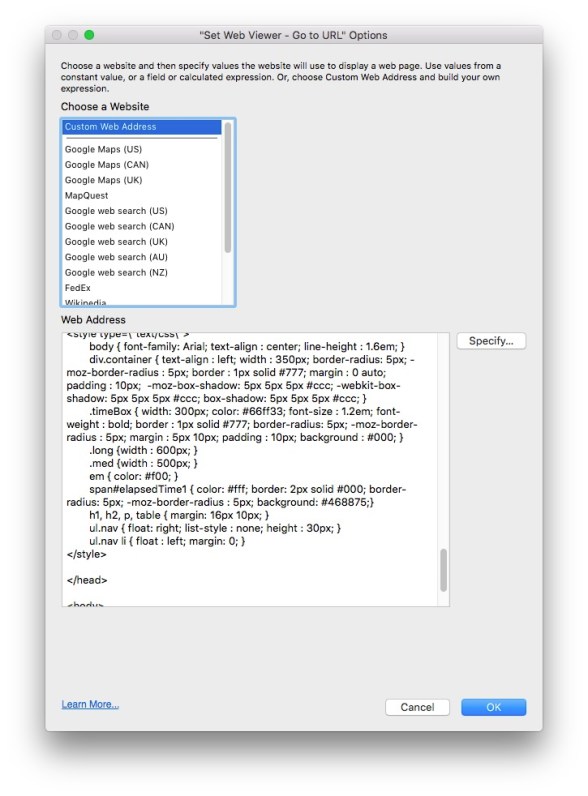
To change the look of the timer, colors, font, size etc. Go into the Set Web Viewer step in the Start Timer script. Then click on the Action: ‘Go to URL..’ option.
Timer Display – CSS and HTML Details
Scroll to near the bottom of the Web Address. Look for the following items in the text:
- div.container – width
- .timeBox – width, color and font-size
Try adjusting these values to see if you can get the look you want in your Timer.
Displaying Days
I am not sure why you want to do this in FileMaker, because most users are going to quit their database at the end of the day, but the Timer is capable of displaying Days as well as Hours, Minutes and Seconds.
To change what is displayed, edit the line near the top of the Web Address – calculated HTML. Put “all” in the ‘show’ Javascript variable if you want to see the complete list.


Comments are closed.