
 July 5, 2010
- UPDATE: 2014-07-31 – ScreenSteps has gone to a subscription model. Following in the footsteps of Adobe, FileMaker and others, presumably, they are trying to set themselves to be a sustainable enterprise going forward. Their pricing is quite high for individuals, as their target market now seems to be corporations, rather than mom and pop’s software developers. Their least expensive offering is a ‘Solo’ plan for $120/year, otherwise it starts at $29/month for two authors. Blue Mango Learning also offers a low-end alternative to ScreenSteps called Clarify ($14.95) and they have recently shipped a version 2 of the product. It has some very nice features that make it actually better than ScreenSteps in some ways (code block for text, resizable canvas, drop shadows!), but it lacks the manual creation features of ScreenSteps. Each document is a stand alone entity, with no larger organization feature.
- UPDATE: 2011-10-10 – Since I wrote this review of the two packages, it should be noted that MacSnapper has only had a minor update and has made no progress in any of the feature areas that I felt it was limited in. ScreenSteps is in active development and continues to improve. Blue Mango Learning has added a blur tool and my desire for in place typo correction has largely been fixed by using Typinator to fix my typos on the fly. The company has also released a lower end program called “Clarify“, which will probably meet the needs of many people who just want to communicate ideas more effectively, and not necessarily create documentation. One of the cool things in Clarify is the ability to expand the area around a screenshot. This is useful for adding some text outside the boundaries of a screenshot. Hopefully this feature shows up in ScreenSteps soon. ScreenSteps continues to be my documentation program of choice.
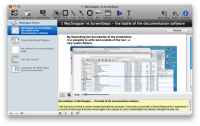
ScreenSteps vs MacSnapper — the battle of the screenshot documentation software
I feel a tad guilty about writing a review comparing these two products. It doesn’t seem right that I should mention the fact that one of my favorite programs ScreenSteps, ($39-$79) now has a competitor.
I have been a promoter of ScreenSteps since I discovered it a couple of years ago and have encouraged a number of other developers to start using it. ScreenSteps has literally changed the way I do documentation for the software I write. With ScreenSteps, I actually look forward to doing documentation for my software, as opposed to it being pretty much an afterthought that I might or might not get around to. In the process of doing documentation, I often discover flaws or obvious user interface changes I need to fix. I also believe that my documentation gets read more often, because it is more visual, accessable and easier to update for my clients. I have taken to linking directly to a dedicated help website from within my FileMaker databases.
Alas, there is a new contender in the screenshot documentation software marketplace called MacSnapper ($49) and I find myself tempted by this shiny new toy.
ScreenSteps Interface

ScreenSteps is obviously the more mature product and the folks at Blue Mango Learning blazed the trail with their dedicated screenshot documentation program. It was written in RunRev, a cross-platform (Mac and Windows) HyperCard-derived language. MacSnapper on the other hand is built using Cocoa and Objective-C, solely for the Macintosh. The look and feel of MacSnapper seems to have been heavily influenced by ScreenSteps.
MacSnapper’s Interface

MacSnapper is a contender based primarily on speed, some nice features and the fact that its interface is so interchangeable with ScreenSteps.
Useful Features in MacSnapper

MacSnapper allows for much more flexible formatting of text, employing a standard Font dialog box when editing text, while ScreenSteps offers a limited set of text formatting options. One thing I would like them both to add to their text editing feature sets is bullet lists.
I like the way the Preview mode in MacSnapper allows you to immediately see the effect of selecting different Template styles. In ScreenSteps, you need to do an export to PDF or HTML to get a sense of what your documentation will look like. In MacSnapper, the PDF version is just a click away — barely noticeable rendering is required. This appears to be as a result of having been written in native Cocoa, employing the extensive programming libraries included in Apple’s Object C. The result is fast launching, resizing, exporting, opening windows and exporting. Like the proverbial frog in hot water, I hadn’t noticed how slow ScreenSteps moves until I tried out a competive product. I haven’t added a couple of hundred lessons to MacSnapper yet, so I can’t say definitively, but it certainly seems faster in all aspects of the interface.
MacSnapper also makes use of a multiple document interface (File/Book/Lesson) unlike ScreenSteps which only has a single file structure, everything is in the same file (Library/Lesson/Manual). This is a design choice that doesn’t make much difference to me. I often use the same lesson for multiple clients when covering general topics, so having everything together can be useful for me.
MacSnapper offers a Customize Toolbar, which is interesting but not much use now as all the icons are required and there don’t seem to be any items not listed. Perhaps over time this will become a more useful feature.
In-Place Spell Checking

In-place spell checking is very useful feature in MacSnapper, especially for people like me, who make lots of typing mistakes. If I want to check spelling in ScreenSteps, I have to use a dedicated Spell Check command to find these errors. To their credit, ScreenSteps offers a keyboard shortcut, but it is one more thing to remember.
Search and Replace

While ScreenSteps offers a Find command, again, it is limited. MacSnapper offers a full-fledged Find and Replace module.
Extra Tools in MacSnapper

The ability to Expand the area of a screenshot is a useful feature, if you want to have some white background and text floating outside of an image.
Blur button

While you can create a fake blur to hide text in ScreenSteps by modifying the rectangle tool, it is nice to have a dedicated blur button as is offered in MacSnapper. This is something I would use often to hide sensitive customer data.
Highlight button

The highlight button is the reverse of blur. It grays out the rest of the image so that you can ‘call out ‘an area for specific attention.
Combining Screen Shots

In MacSnapper is possible to drag an additional screenshot onto the existing screenshot and then rearrange the images to illustrate something like the difference between two dialog boxes. Unfortunately, the original screen shot is not treated the same way as the new additions. There is no easy way to delete the underlying screenshot and you can’t send the newly added screenshots to the back of the original screenshot. Hopefully this is something the developer of MacSnapper will improve in the next revision.
Headline problems on PDF export

If a ‘step’ title is too long in MacSnapper, it works fine if in the HTML preview, but when you click the PDF button, the title just disappears, rather than gracefully expanding.
Things missing

There are a number of things missing from MacSnapper. I couldn’t see a way to add video lessons, which you can do in ScreenSteps. I couldn’t find a way to add a step that had no screenshot, just text. (My workaround was to paste in a small white box, where the image went). They seem to lack a dedicated ‘copy to clipboard’ action. I use this all the time in ScreenSteps to generate an email lesson for my customers. After some hunting around, I found that if you go into Preview mode for the lesson, it is possible to copy out a lesson in HTML, which can then be pasted into an email.
Keyboard navigation in the interface is a bit awkward in MacSnapper. Each ‘step’ is a window item. There is no easy way to move from one screen to the next. It would be nice if MacSnapper used the arrow keys to allow you to move through items and then move up to the Lesson level and move from screen to screen. Something like the approach used in NetNewsWire would be good.
There doesn’t seem to be a way to replace a screenshot, short of creating a new one and then moving the text to it, then delete the old screenshot. In ScreenSteps, they have a button to replace with a new ScreenShot. I tried pasting over the existing one, but it doesn’t work.
I could not find a way to import a batch of images. In ScreenSteps, if you have already created your screenshots as files, you can just drag and drop them onto the screen and have a batch of steps automatically created. In MacSnapper, there does not appear to be a way to create a lesson from a batch of previously created images.
Other features, that it would be good to have include; an import for ScreenSteps lessons; adding blank steps, without the need for a screenshot; adding movie steps and finally better keyboard navigation.
More Export Options in ScreenSteps

ScreenSteps has created their own eco-system for managing the online distribution of your ScreenSteps manuals called ScreenSteps Live. It is a monthly fee web service where you can maintain multiple private domain help files for your customers.
ScreenSteps also wins the battle for export options. In addition to the basic PDF and HTML export options, ScreenSteps offers support for direct export to ScreenSteps Live, WordPress, Type Pad, Movable Type, Confluence, MindTouch, Blogger and Google Sites. Currently MacSnapper only offers WordPress, PDF and HTML.
Cocoa vs RunRev

I have a confession to make about the programming language that ScreenSteps is written in. I went quite far down the road of attempting to learn the RunRev programming language. I went to a conference, bought the software, paid for some tutoring and got another conference DVD with all the materials on it. I even made a fair bit of progress on developing an application. While I love the approach of an English-like programming language that is easy to read and edit, in the end, I chose to stop writing in RunRev because the results never felt right, interface wise. (Instead I continue to work in the devil I know, FileMaker Pro, a language with its own set of non-native interface problems.)
Steve Jobs is probably correct in limiting cross compilers on the iPhone. By their definition, they play to the lowest common denominator and sacrifice speed and interface elegance to the efficiency of being cross-platform.
While RunRev can be a great solution for those who want to quickly create cross-platform Mac and Windows apps, the results are never going to perform like a native application. Seeing the speed and interface differences between ScreenSteps and the Mac-only MacSnapper, the answer is obvious. MacSnapper, gives a much quicker and ultimately satisfying user experience on the Mac.
Perhaps some day I will take on the challenge of learning Objective-C.
Conclusion
I probably won’t abandon ScreenSteps quite yet, as I have over 250 lessons in their proprietary file format, which would not be easy to move across, but it is definitely tempting. Perhaps with a few more versions, MacSnapper will mature into a truly worthy competitor to ScreenSteps. For now, it has some very nice features, foremost vastly better speed, and provides a tempting alternative if you don’t need all the features of ScreenSteps. ScreenSteps is the more mature product, with a Windows version, the ability to add videos and a dedicated web service for posting your password protected manuals to select audiences. They say competition is good and hopefully the appearance of MacSnapper will push ScreenSteps to new heights.
Related Articles:
‘FileMaker Go for the iPhone’ – a First Look
WordPress FileMaker Sync price dropped
Submitting FileMaker Runtimes to the Mac App Store


Trackbacks/Pingbacks
[…] ScreenSteps vs MacSnapper July 2010 4 […]
[…] Articles: Blast from the Past: FileMaker Pro 6 Review ScreenSteps vs MacSnapper WordPress FileMaker Sync […]
[…] Articles: ScreenSteps vs MacSnapper Move Selected Files into a New Folder using AppleScript and Automator […]
[…] – I have written about this product (or its precursor Screensteps elsewhere). I view this as a must-have tool for documenting my database solutions for clients and for […]