
 July 21, 2012
There are a number of good articles on setting up Time Machine backup hard drives. This blog entry is a little different. A client recently encounter a problem with their Time Machine backup. This article is if you already have a Time Machine hard drive that is giving you troubles.
Get a new hard drive
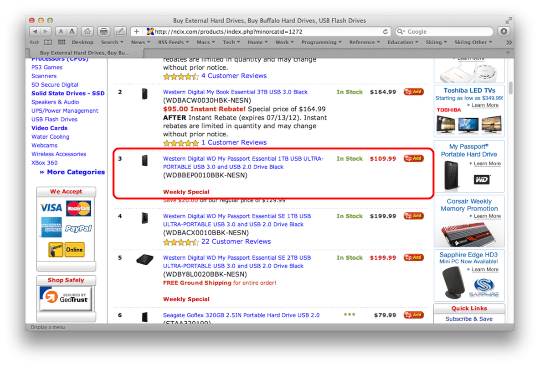
Hard drives fail, that is the reality of the modern age. If your Time Machine hard drive is giving you any grief, my suggestion is to purchase a new drive. It may be the old drive is fixable, with just a new power supply or by reformatting the drive, but sometimes by the time you figure that out, you could well have spent more time/money than you would have by simply purchasing a new drive. 1 TB hard drives are available for around $100 these days.
How large a hard drive will you need?

Review your backup size requirements. If you click on the icon of your hard and type Command I, or go under the File menu and select “Get Info” you will see the info panel on your current hard drive. My drive is 1 TB, but I am only using about 750 MBs, so I can get away with a 1 TB hard drive for backup for a while. Ideally, I would probably go for a 1.5 TB or 2 TB hard drive.
Format your new hard drive with Apple’s built-in Disk Utility
Plug the newly purchased hard drive in, putting the power brick into the wall or powerbar and the USB cable plug in to your Mac.
Run a program called Disk Utility, which should be in the Applications folder, Utilities folder.
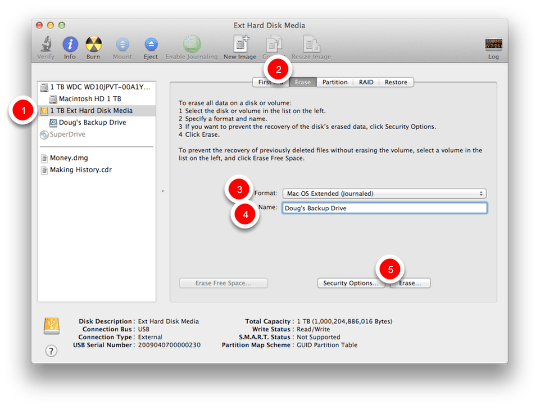
Erase the drive and format it as Mac OS Extended (Journaled)
1. Click on the drive
2. Go to the Erase tab
3. Set the format to Mac OS X Extended (Journaled)
4. Give the drive a name
5. Click erase
This first erase step should not be deleting any data as the hard drive is brand new, you are really just formatting it to work with your Mac. Most hard drives come formatted for Windows machines, unless they are specifically being sold as Mac backup drives.
Copy your backup from the old drive if possible
If your old hard drive is functional enough to copy your old Time Machine backup files, you could do this step first. That way you can still have access to your recent backups. If the old hard drive won’t boot up or stay connected consistently, then you are starting fresh.
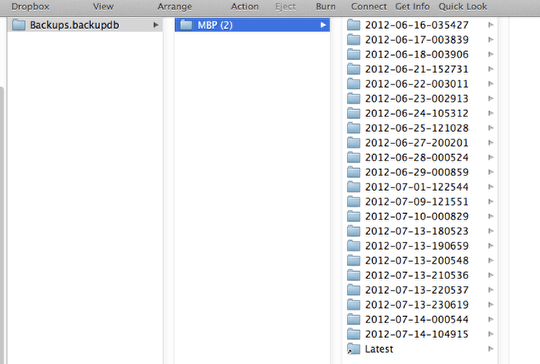
With the two machines plugged into the same computer, drag and drop the Backups.backupdb folder from the old drive to the new drive.
Setup Time Machine
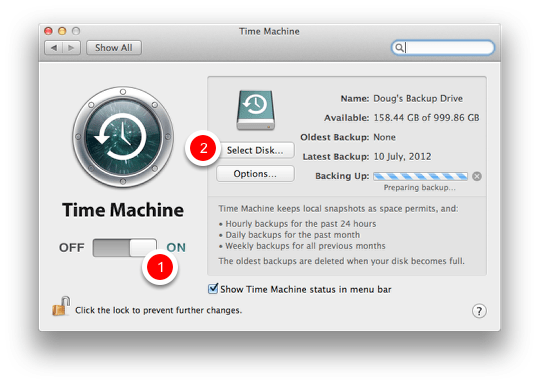
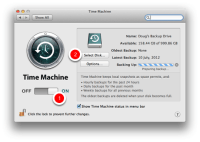
Once the hard drive is formatted and your old Time Machine backup files have been copied over (if possible), go into the System Preferences, under the Apple menu, and select the Time Machine preference panel.
1) Turn Time Machine on, it is not already on.
2) Select Disk… to choose the new hard drive for your main backup drive.
Another way to get to Time Machine settings
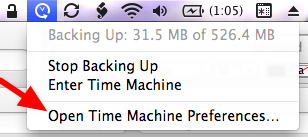
If you have clicked the option to ‘Show Time Machine status in menu bar’, you can also get to Time Machine Preferences.. by clicking this menu option.
Select the new hard drive in Time Machine
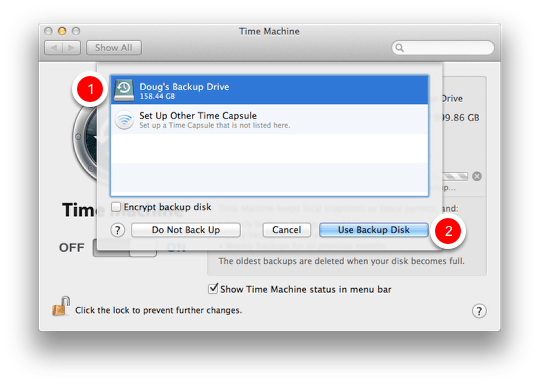
In the Time Machine Preferences panel, select the new drive as your new Time Machine backup and click ‘Use Backup Drive’.
That should be all the setup required. If you have the ‘Show Time Machine status in menu bar’ option turned on, momentarily, you should see Time Machine kick in and attempt its first backup. You will see the small icon in the menu bar spinning, indicating it is working. When you are sure your backup has worked, testing it by entering Time Machine to view your backup, you can move on to the next step, cleaning off and disposing of your old hard drive.
Erase the old hard drive
Once your new drive is setup and functioning, it is time to clear off the old hard drive and get it ready for recycling. If the hard drive is functional enough to plugin to your computer using Disk Utility, erase the old drive.
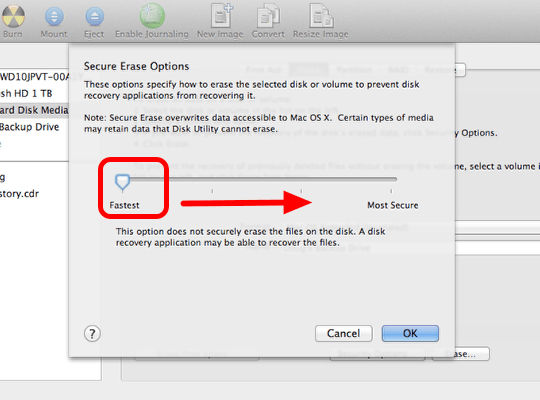
Follow the same steps as above, but this time before you click erase, choose the ‘Secure Erase Options’ to ensure a more secure deletion of any files on the old hard drive. Basically the more secure, the more times zeros and ones are overwritten onto the drive, making it impossible for others to access the information. The farther the slider is pulled to the right, the longer the erasing process takes.
How to delete the Time Machine files if the old drive won’t boot
If you can’t boot the old drive, look for a electronics recycling centre (Is there a Free Geek near you?) that offers hard drive wiping or destruction. Sometimes this entails a large magnet, other places have a device the physically destroys the platters of the hard drive. Ask to watch the process yourself to ensure that it gets done. Lifehacker has some methods of do-it-yourself destruction.
Related Articles:
ScreenSteps vs MacSnapper
Move Selected Files into a New Folder using AppleScript and Automator
Growl Integration with FileMaker


I also like to keep backup by using Time Machine but there are some limitations of Time Machine. You can not create bootable backup or clone for this purpose I use Stellar Drove Clone. It helps to keep Mac backup either in the form of clone or image.
My local Mac dealer also recommends Carbon Copy Cloner for older Macs that can’t run Time Machine.