
 November 8, 2017
Now that Instagram allows you to view your Saved Bookmarked photo collection in a web browser, here is a method of downloading your favorite photos to your hard drive.
Safari: Preferences
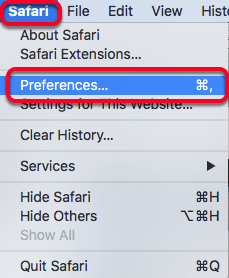
With Safari open, go to the Safari menu and select ‘Preferences’.
Advanced tab: Turn on “Show Develop Menu…” option
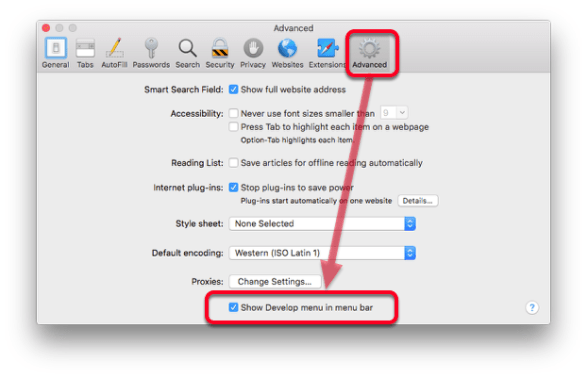
In the Advanced tab, select the option to ‘Show Develop menu in menu bar’.
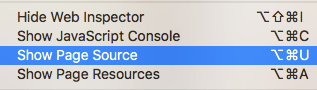
Develop Menu: Select “Show Web Inspector” menu item

Close the Preference window and now a new menu should appear along the top called “Develop”. Look for the option called “Show Web inspector”. For some reason this is displaying as ‘Connect Web Inspector’, but is should say ‘Show Web Inspector’.
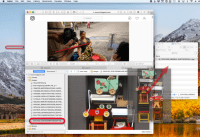
Click on ‘Images’ folder in the bottom left panel

When the panel opens at the bottom of the screen, in the lower left panel, look for the ‘Images’ folder. If you toggle it open, you will see a list of photos. Note that only the photos that have loaded in Instagram will display here. The first few images may be small icons of from your friends feeds, but as you go down the list, you should see some of the full resolution files you are looking for. The best way to do this is to load all the photos you want to download in your browser first. This can be done by selecting a particular person or going to one of your Saved photos lists. Scroll all the way to the bottom of the list, until no more photos load. Then open the Images folder in the Web Inspector panel and start drag and dropping the photos out of the list.
Select Image in left panel and then drag and drop the displayed image to a folder on your desktop.

If for some reason there is no Folder list which includes an Images folder, select from the Develop Menu “Show Page Source”.
Click on the photo in the left panel, then click and drag from the photo panel to your desktop or a folder you have created.
Alternatively, right click (or Control click) on the image to get to the ‘Share’ menu.
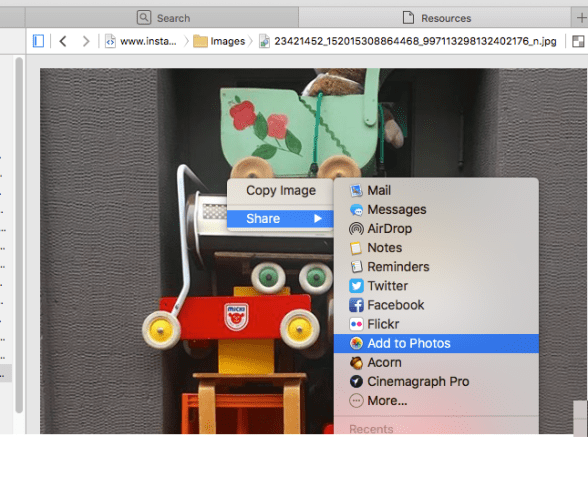 With the Share menu, you can import directly into Photos or send to another location.


Comments are closed.