
 May 25, 2015
OK folks, here is a hack for you.
The Challenge: Capturing images from a web cam into FileMaker on Windows. I was able to achieve this previously on a Mac using AppleScript, but there is no similar easy inter-application scripting language on Windows. FileMaker Go on mobile has the ability to grab photos right from the camera on an iPhone or iPad. Most PCs these days have a webcam plugged in and many laptops have built-in cameras, but so far FileMaker Inc., does not directly support the capability of taking photos in its desktop applications. Hopefully this feature will be added going forward. In the meantime, this hack provides a workaround.
My reason for attempting this project was to automate the process of taking customer photos at a gym for my PassTracker software. Usually I recommend that PassTracker owners run their systems on a Macintosh, but sometimes they already have Windows computers setup and don’t want to switch over.
The Solution: Using the free plugin ScriptMaster to Screen Capture portions of a Web Viewer window. The Web Viewer is pointed at the URL for a web cam’s video stream. Intrigued? Read on.
Demo File

Ingredients

- A Windows PC
- The appropriate plugin technology to view the web cam installed. Options include:
- Flash
- Java
- Active X
- FileMaker Pro
- Java – free browser plugin and runtime
- ScriptMaster – free FileMaker plugin from 360Works
- Demo file
Video Sources
- An IP Web Cam (also called Network Cams) – many options available
- Live Webcams video feeds from the internet
- Turn your built-in or USB camera into a video source viewable in a browser
- iSpyConnect – free Windows application and open source. I know, I know, willingly installing something called iSpy on your computer. That said, this software seems to be legit. There are paid plans for remote monitoring, but you can set up local monitoring on a LAN, for free. Even with the free local monitoring, you still log into the iSpyConnect web site to view.
- CamSpinner – an under $15 Macintosh program that sets up a local web page based on your selected webcam
Skill Level: Moderate
Note: This approach will work on a Mac as well, just avoid using web cams that requires ActiveX, a Window-only component, to display their video.
Another Note: In theory, this approach should work in any version of FileMaker Pro that ScriptMaster supports, although you will have to re-write the scripts from the demo. I was working in FileMaker 14 and the demo file is in .fmp12 format and should be useable in FileMaker Pro 12.
- Free or inexpensive software components
- Can frame the photo to desired length and width in pixels
- File sizes can be smaller
- Trial and error selecting the appropriate screen area to capture
- Image quality is limited to screen resolution, not the true capability of the camera
- It’s a hack. Lots of ‘moving parts’, potential for something to break in the future
Another Challenge: Windows Web Viewers based on old tech

FileMaker Pro has this great ability to view web pages within a FileMaker layout. This capability is called a Web Viewer. You just ‘draw’ a Web Viewer object on any layout, give it a URL and presto, you are looking at the Internet from within your favorite programming environment. This allows you to do all kinds of useful things, such as display Google Maps, lookup foreign exchange rates, drag and drop images from the web etc.
On a Macintosh, Web Viewers employ Safari, a reasonably modern, standards-based browser. Unfortunately, Web Viewers in FileMaker Pro running on Windows are based on Internet Explorer (IE), not the most modern of web browsers. In fact even Microsoft plans to abandon IE in the near future with the launch of Windows 10. They are moving towards a more modern architecture browser called Edge that will more easily support HTML5. HTML5-oriented browsers have the capability of playing video right in a browser window, without the use of plugins. Not so for IE. Back in the here-and-now in a FileMaker Web Viewer on Windows, to play video, IE requires either Flash or Java plugins to be installed, both of which have well documented security flaws. With that proviso, lets forge ahead.
Install ScriptMaster plugin

- Download ScriptMaster and unzip the file.
- Copy the appropriate ScriptMaster (32 bit or 64 bit) plugin into your extensions folder inside the FileMaker Pro Extensions folder
Download and Install Java

Java may already be installed and up to date on your system. If you have any problems or see any error messages when launching and testing ScriptMaster, (which relies on Java SE, not quite the same thing as a Java web browser plugin), then go to Java.com and download the latest version of Java.
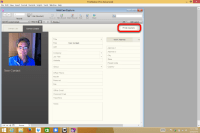
FileMaker Demo

The FileMaker demo I have created is based on the Contacts Starter Solution. The important scripts are at the top of the script list in a folder called ‘Web Cam Capture Module’. For the purposes of the demo, I added a Video Sources table and so the scripts are drawing from that. This is not necessary. If you are just going to add this to a solution and will only ever need one video source, then it is possible to skip all that and just set the parameters directly in a script, or create a set of local global fields for the customer to adjust.
The Scripts

Required Scripts
- Web Cam Capture – Register 360 Works Screen Capture – Add this to your Startup Script
- Web Cam Capture – Open Web Cam Capture Window
- Web Cam Capture – Take Web Cam Snap
Optional scripts – If you plan to have multiple Video Sources, these scripts and extra data table may be worthwhile.
- Web Cam Capture – Reset Fields to Windows Parameters (Utility script to clear out the offsets fields)
- Web Cam Capture – OnObjectModify Update URL (Utility script if you plan to have more than one video source)
- Web Cam Capture – Add|Edit a Video Source (Utility script if you plan to have more than one video source)
1) Register the Module

1) ScriptMaster works a little differently than other plugins. Because it is based on Java, you need to ‘register’ the particular module. This is done by setting a variable in a very simple script. This script should be added to the Startup script for your solution.
2) Open a Window with a Web Browser

Note that when opening the window, we are setting the $$WebCamCaptureURL. This global variable is used to set the Web Viewers URL. If you are hardcoding the script, rather than pulling from a data table, enter the URL (in quotes) from which your chosen video source can be viewed.
3) Adjusting Screen Capture Coordinates

ScriptMasters’ ScreenCapture function requires four screen coordinates in order to screen capture a rectangle of the screen.
In the demo file’s script, the default setting is to capture the entire FileMaker Window whose coordinates are determined using FileMaker’s built-in functions for this:
- Get(WindowLeft)
- Get(WindowTop)
- Get(WindowWidth)
- Get(WindowHeight)
You could also name the Web Viewer (something like WebCamCaptureWebViewer) and then use
- GetLayoutObjectAttribute ( “WebCamCaptureWebViewer” ; “left” )
- GetLayoutObjectAttribute ( “WebCamCaptureWebViewer” ; “top” )
- GetLayoutObjectAttribute ( “WebCamCaptureWebViewer” ; “width” )
- GetLayoutObjectAttribute ( “WebCamCaptureWebViewer” ; “height” )
This approach would capture just the Web Viewer frame instead of the entire FileMaker window.
Because you may want to capture just a portion of the onscreen video (for instance to crop a photo into portrait mode), there are a set of fields to let the user enter offsets to these values. These could be Global Fields in the same data table as your photo, or could even be set in the script if you are only using a single video source, I have a data table for video sources so I can display multiple network camera feeds. Exposing the offsets as Global Fields for the user, allows for customization if the video source changes.
The ‘Reset’ button sets all the offset fields back to no value. The screen capture then will grab the entire FileMaker ‘Take a Photo’ window.
Note: when you are editing Left and Top, you are adding pixels. When editing Width and Height, you are subtracting them from the Width and Height values.
4) Grab a Screen Capture

Flash Video Sources

For the purposes of the demo, I included some Flash-based web cam services that you can use for selfies from your built-in or USB webcam. Depending on your Flash settings you may find yourself having to re-click the Allow button each time the FileMaker window is re-opened. If you Right Mouse Click on the Flash portion of the window (within the Web Viewer), you should see an option to change the Settings. Clicking on ‘Allow’ and then ‘Remember’ will save the settings so that you don’t reset it each time you reload the window.


Comments are closed.